Verify Access Requests (For Reviewers)
If your Permission Assist Administrators have set up a verification process for access requests, you many need to review and verify the changes after the Provision Engineers complete their work.
The process you use to verify changes will be one of the following, depending on your financial institution's best practices and the guidance you may have received from internal and external audit teams:
Verify Permissions Within Permission Assist
When the access request is ready for verification, you'll receive an email. Talk with your Permission Assist Security Team to request that new data be imported into Permission Assist. When they confirm that new data was successfully imported, complete the following steps to verify the access changes were completed correctly:
-
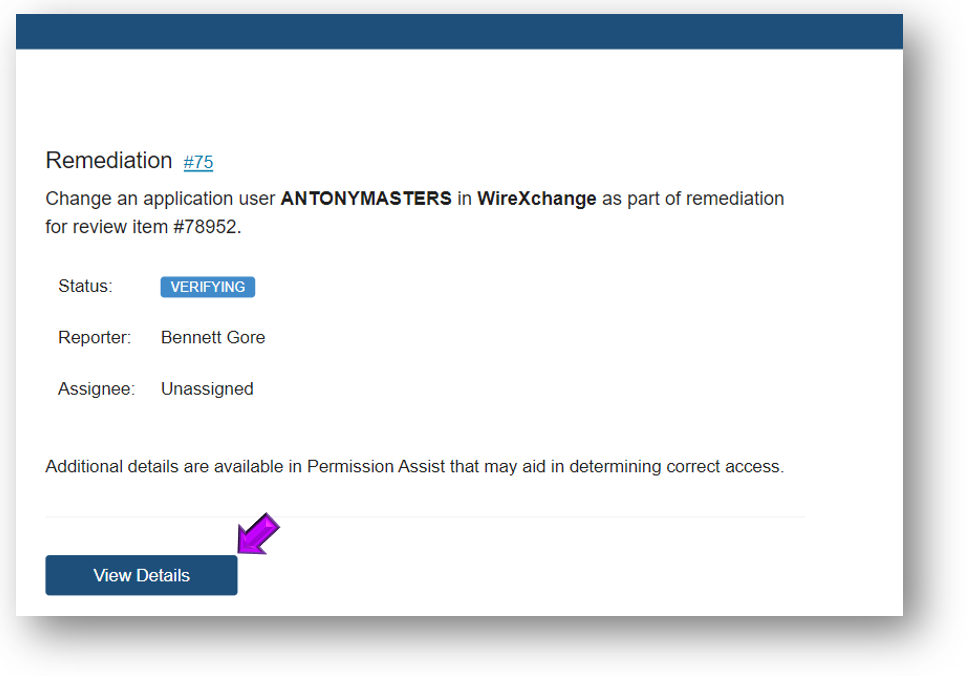
Open the access request that needs to be verified by selecting the View Details button within the email (see example below).
The Access Requests Details page opens in a new tab within your browser, which allows you to review the information related to the request.
TIP: You can also open the access request by going to the Change Management Taskboard and selecting the access request you want to work on. To open the Change Management Taskboard you can either:
-
Select Oustanding (under the ACCESS REQUESTS heading) on the Home page, or
-
Go to the My Taskboards menu and select Access Requests.
-
-
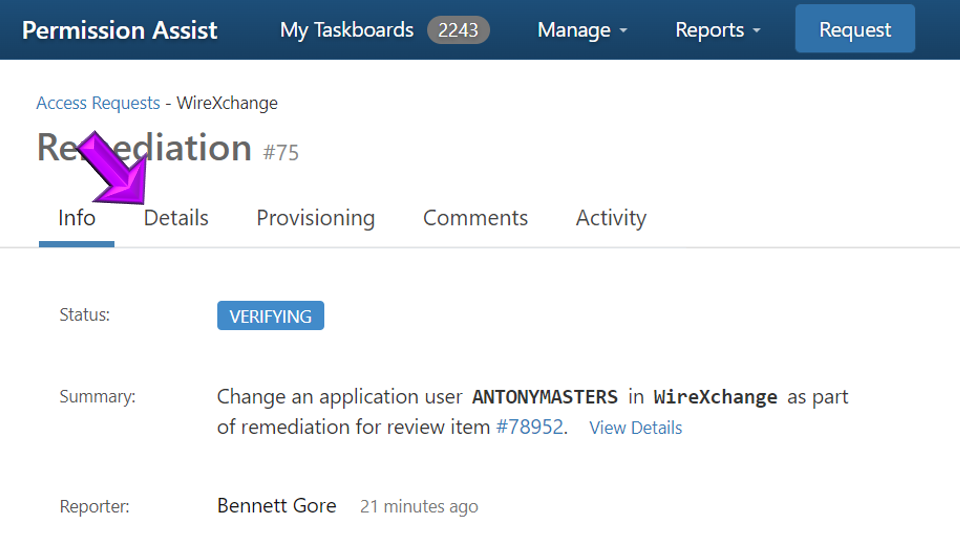
Review the details of the item within the Info tab.
-
Select the Details tab (see picture below).
-
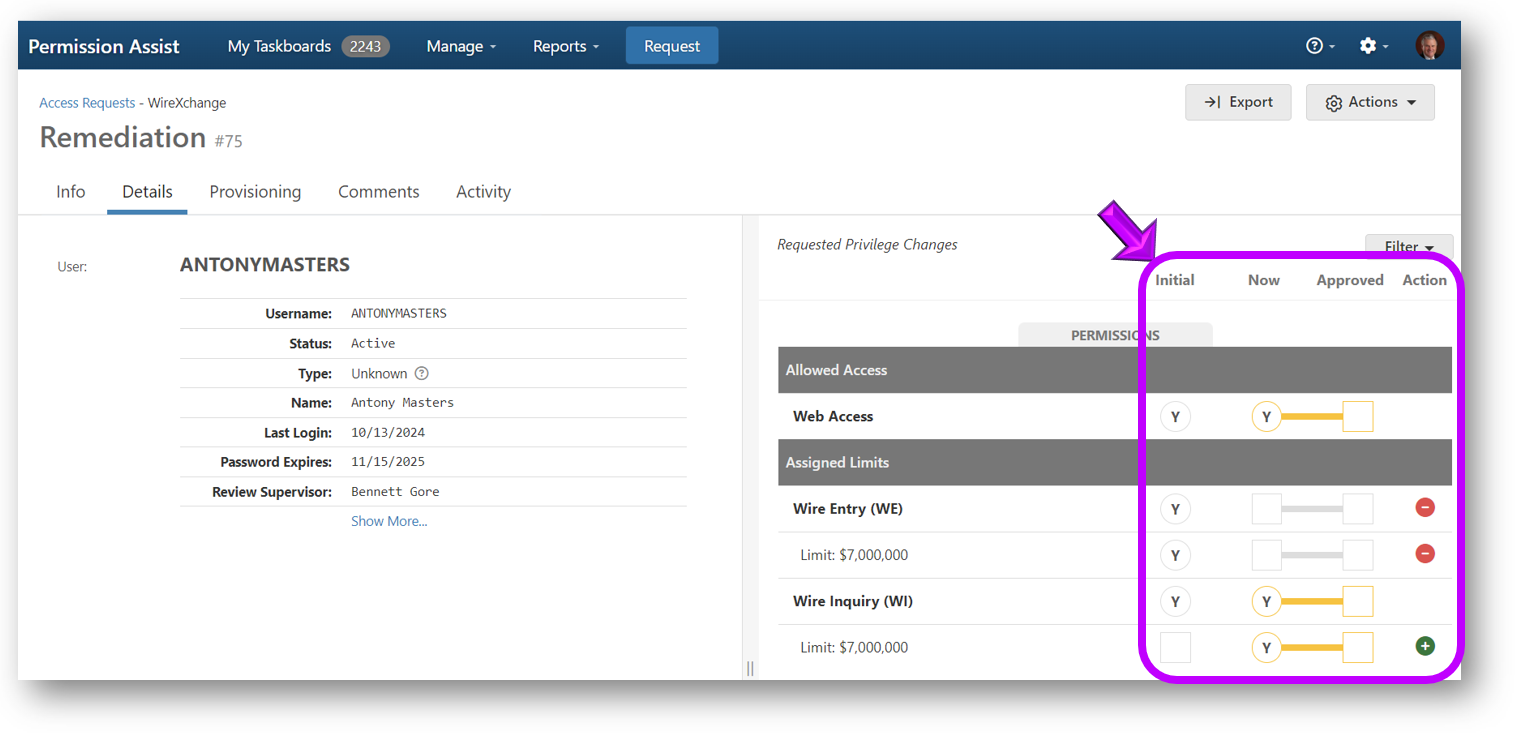
Compare the columns of information on the right side of the page (see example below) to ensure the proper changes were made:
- Initial - displays the permissions the user had when the review started. These permissions will not change once the review is started.
-
Now - displays the permissions the user has now. These permissions will change as new application data is imported. You can use this column to verify that changes were made correctly.
-
Allowed - indicates whether the user is allowed to have these permissions based on the Entitlement Roles they're enrolled in.
-
Action - this column displays the requested changes to the user's permissions.
-
If the Comments tab shows a number of comments are available, select the Comments tab to review the additional comments associated with the access request.
NOTE: If for some reason the changes weren't made properly, you can also use the Comments tab to communicate with the Provision Engineer by sending them an "at message".
-
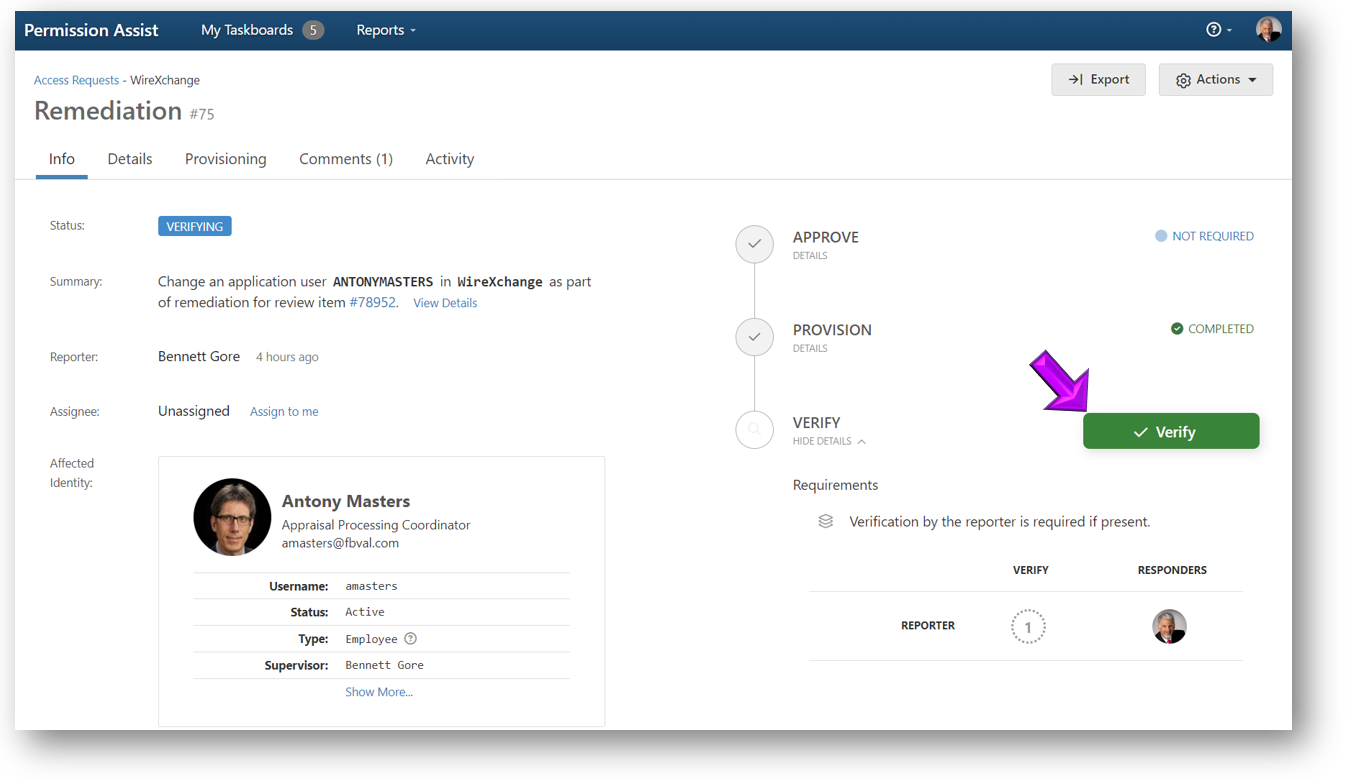
When you are confident the access request has been completed successfully, go back to the Info tab and select the I Verify button.
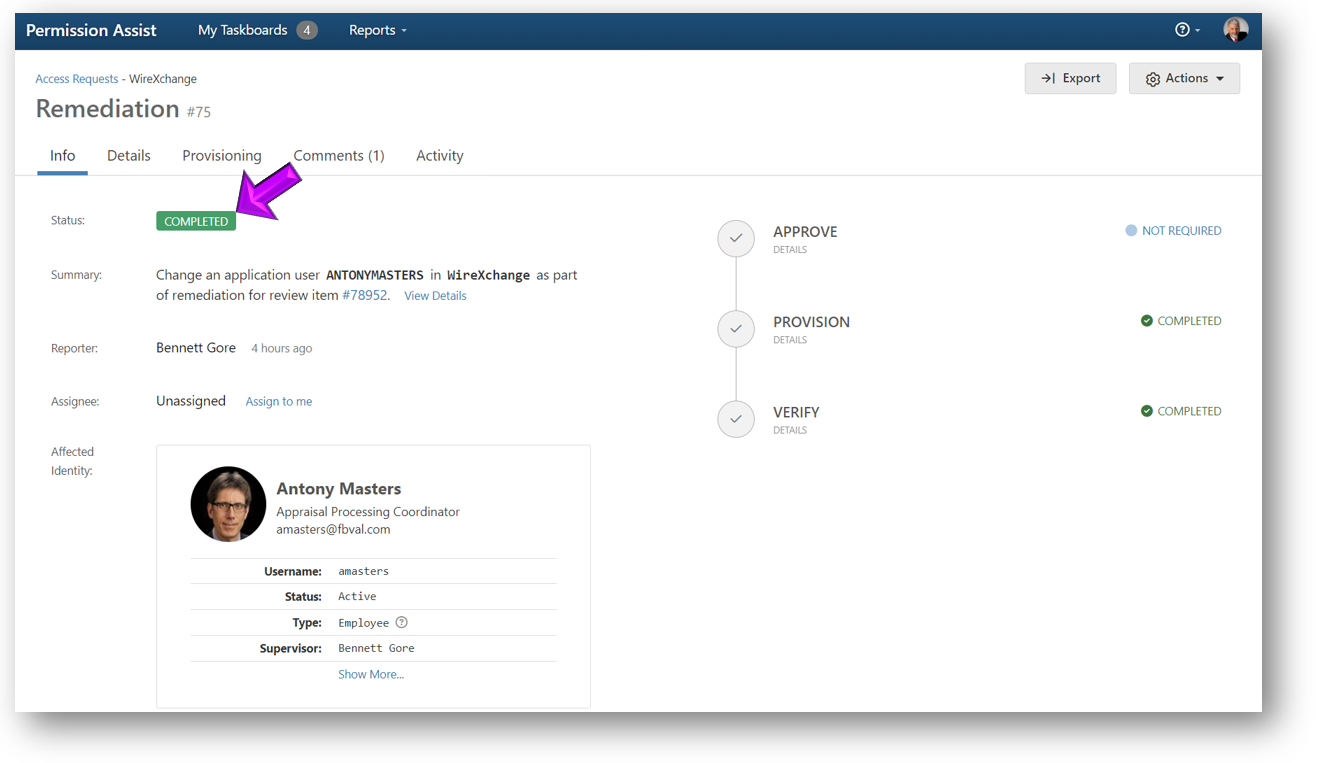
The status of the access request is changed to "Completed" (see picture below), and the status of the corresponding review item is changed to "Remediation Complete". At this point your work for this request is done – GREAT JOB!! Give yourself a high five!!
Verify Permissions Within the Application
When the access request is ready for verification, you'll receive an email. Complete the following steps to verify the access changes were completed correctly:
-
Open the access request that needs to be verified by selecting the View Details button within the email (see example below).
TIP: You can also open the access request by going to the Change Management Taskboard and selecting the access request you want to work on. To open the Change Management Taskboard you can either:
-
Select Oustanding (under the ACCESS REQUESTS heading) on the Home page, or
-
Go to the My Taskboards menu and select Access Requests.
-
-
The Access Requests Details page opens in a new tab within your browser, which allows you to review the information related to the request.
-
Review the details of the item within the Info tab.
-
Select the Details tab (see picture below).
-
Review the columns of information on the right side of the page (see picture below).
- Initial - displays the permissions the user had when the review started. These permissions will not change once the review is started.
Now - displays the permissions the user has as of the most recent import. These permissions are updated as new application data is imported, so you can use this column, along with the Approved and Action columns, to verify that changes were made correctly.
Approved - indicates whether the user should have these permissions based on the Entitlement Roles they're enrolled in.
Action - The Action column indicates which action is being requested. The
 symbol indicates the request is to add permission. The
  symbol indicates the request is to remove permission.
-
While leaving the Details tab open, log into the application and view the user's permissions.
-
Compare the changes the reviewer requested (shown in the Action column within Permission Assist) with the current user's permissions in the application.
-
If the Comments tab shows a number of comments are available, select the Comments tab to review the additional comments associated with the access request.
NOTE: If for some reason the changes weren't made properly, you can also use the Comments tab to communicate with the Provision Engineer by sending them an "at message".
-
When you are confident the access request has been completed successfully, go back to the Info tab and select the I Verify button (see example below).
The status of the access request is changed to "Completed" (see picture below), and the status of the corresponding review item is changed to "Remediation Complete". At this point your work for this request is done – GREAT JOB!! Give yourself a high five!!
